Before using Zoom to host or record a session, you’ll need to enable it in your course. Watch the video or read the written instructions below for instructions on how to enable Zoom in your online course.
- After logging in to Webcourses@UCF, navigate to your course via the Dashboard.
- To enable Zoom in your course, click the Settings link at the bottom of the course navigation menu.
- Click the Navigation tab at the top of the page.
- On the Navigation settings page, you’ll see two lists of links. The top list displays links that are enabled in the course, while the bottom displays links that are hidden in your course. There are two ways a link can be enabled:
- Click and drag an item from the bottom list of links to the top list of links.
- Scroll down and locate Zoom in the disabled link list. Click on the triple dot menu and click Enable.
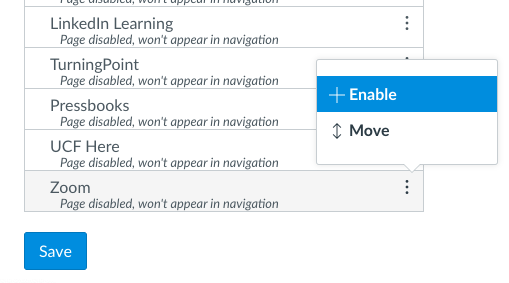
- After enabling Zoom, scroll to the bottom of the page and click Save.
- Zoom will now appear in the course navigation menu.
Error Message Workaround
Some users who have used Zoom in the past are receiving 1001 and 2216 errors when attempting to access the integration in Webcourses@UCF for the first time. To resolve this error, take the following steps:
- Navigate to ucf.zoom.us
- Click Sign In
- Log in with your NID and NID password
Once you have successfully logged in and accepted any prompts that appear, refresh the Zoom integration page in Canvas, click authorize if prompted, and you should be taken to the Zoom dashboard.
Next Steps with Zoom
To learn about hosting a meeting in Zoom, scheduling meetings for a later date, and other topics, visit our Frequently Asked Questions About Zoom page.For more information about navigation links, visit the Canvas Guide on navigation links for further instructions.